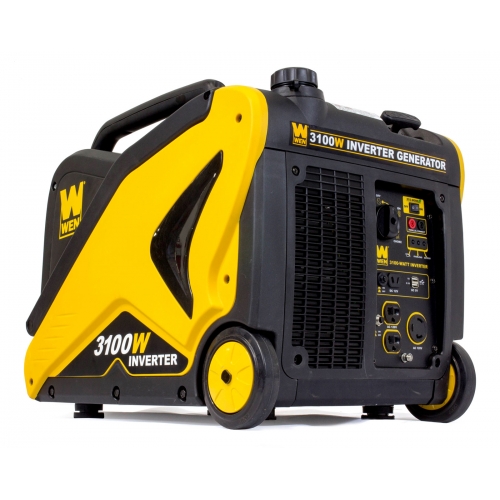
Some of you know how loud our generator is. We this is no more. We have upgraded our generator. Our new generator is quieter, provides more power, lighter and is more fuel efficient. This mean you may not even hear us detailing your car. Plus we can run more equipment at the same time witch means we can clean quicker.
We are still working on how this generator will be placed in our trailer but, for the time being we have decided not to mount this in our trailer like our older generator. This means that our equipment in the trailer will stay cooler, but may mean a slower setup time. We are still working this all out. We will have pictures soon of our new setup.
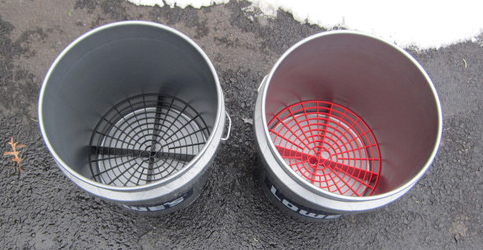
We use 2 sets of buckets to wash your car. One set is used to wash just the wheels and the wheel wells. The other set is for washing the entire car. This prevents contaminates from the wheels from scratching the car.
The two bucket car wash method greatly improves washing efficiency and helps to reduce damage that improper washing can cause. More times than not when people set out to wash their car, they only use one bucket filled with soap and one wash mitt or sponge. This seems practical until you realize it’s doing more harm than good to your vehicles paint.
The problem with the one bucket setup is when you go to wash your car you are trapping the dirt and grit that’s on your car into your wash mitt or sponge and that dirt and grit is then transferred into your “clean” wash bucket. Now, your “clean” wash bucket has dirt and grit particles floating around in the bucket and these particles are staying trapped in your wash mitt. Then being transferred back onto your car’s paint when you go to wash the next section, leaving many little scratches everywhere you drag your wash mitt. To minimize and avoid dirt being trapped in your wash mitt and contaminating your clean wash bucket, a second rise bucket should be used. Hence, the two bucket method was born.
The two bucket car wash method effectively removes dirt from your wash mitt and keeps it in your rise bucket. The most effective way to minimize damage to your car’s paint while washing is to wash a panel or section at a time. Once you are done washing a particular section place your wash mitt in the rise bucket, and then into your wash bucket.
To even further minimize scratches and swirls it’s a good idea to use two different wash mitts, one for above the belt line of the car and one for below. Below the cars belt line is usually much dirtier than above and it will help to minimize trapped dirt and grit coming back in contact with your paint. It’s helpful to label one wash mitt on the cuff with a star using a permanent marker to keep them separate. It’s also important to wash in a linear motion and not to scrub the car in a circular pattern, which will leave lots of noticeable swirls and scratches if any dirt or grit is stuck on the wash mitt.
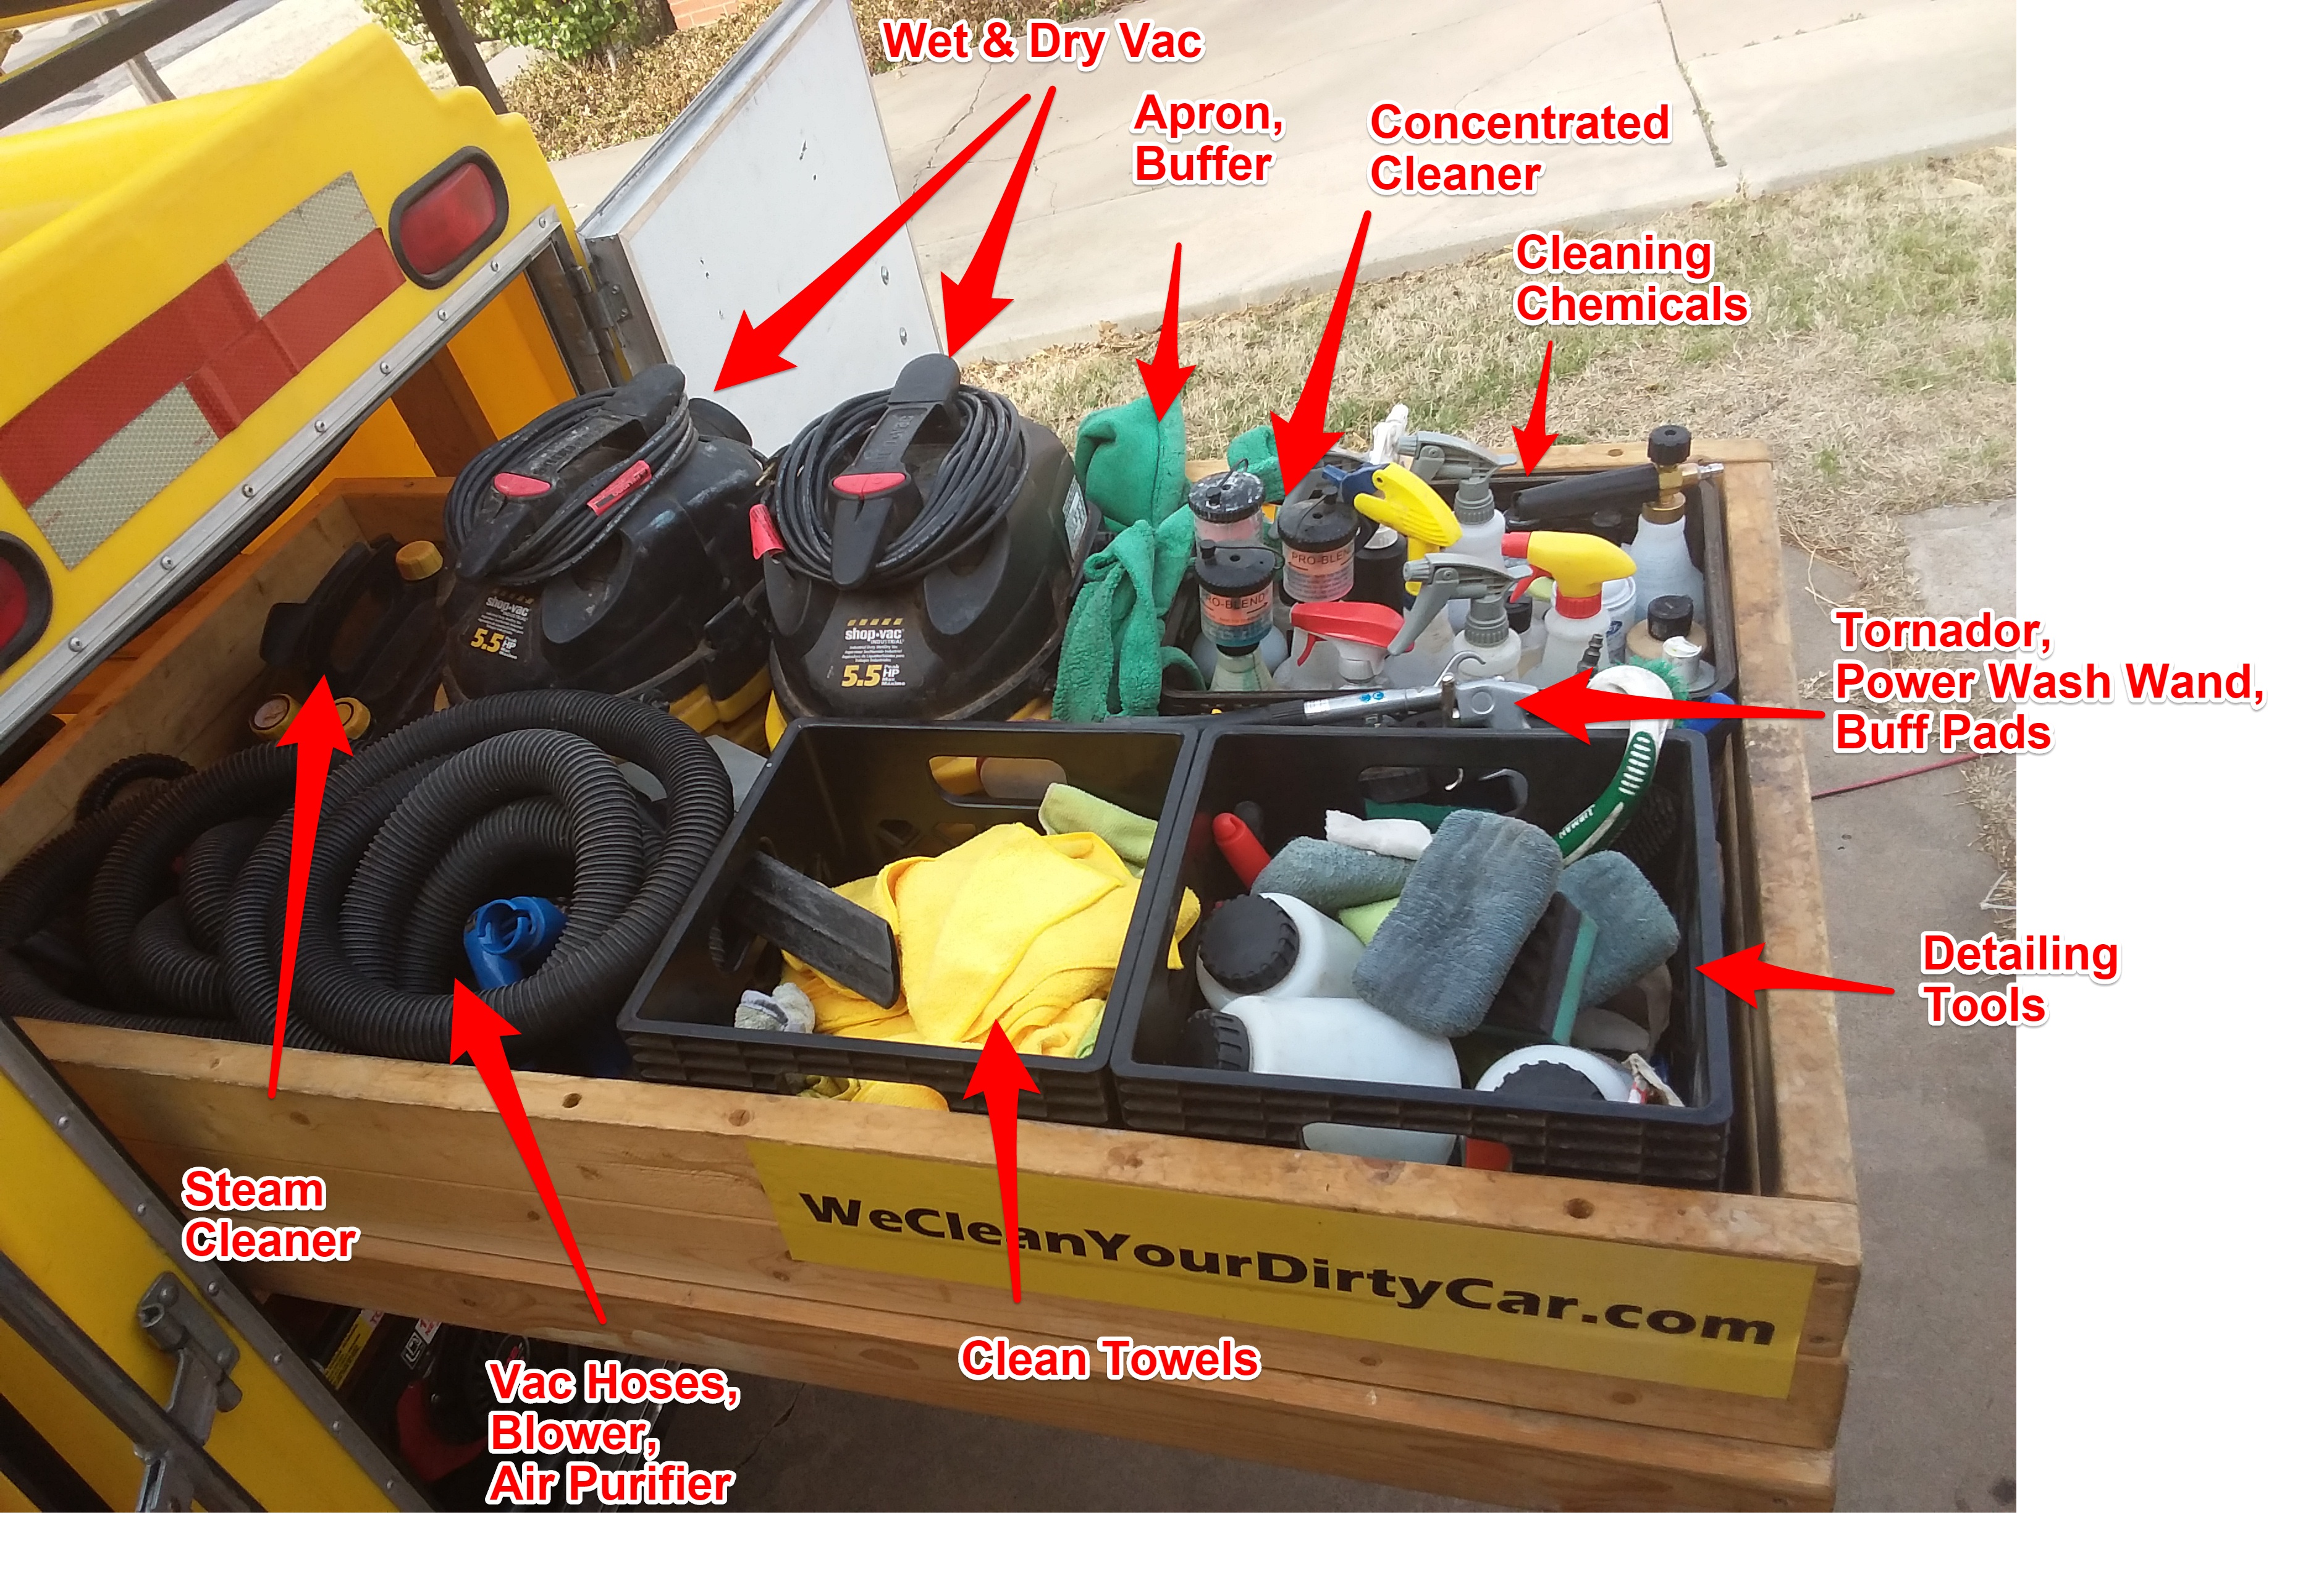
We bought several new tools last year. Beginning of last year, we bought a set of tools that can remove 99% of dog hair from carpet with ease.
We installed a water softener early last year. This helps reduce spots on the car and helps protects our equipment. However, we are in the process to replace this system with a reverse osmosis system this year. More on that later.
Mid-summer 2016, we purchased a tool called the Tornador and all the equipment to make it work. This revolutionized how we clean a interior of a car. We thought that this would make us faster at cleaning a car, but what we found it made us better at cleaning the car. Here is a few videos showing how it works.
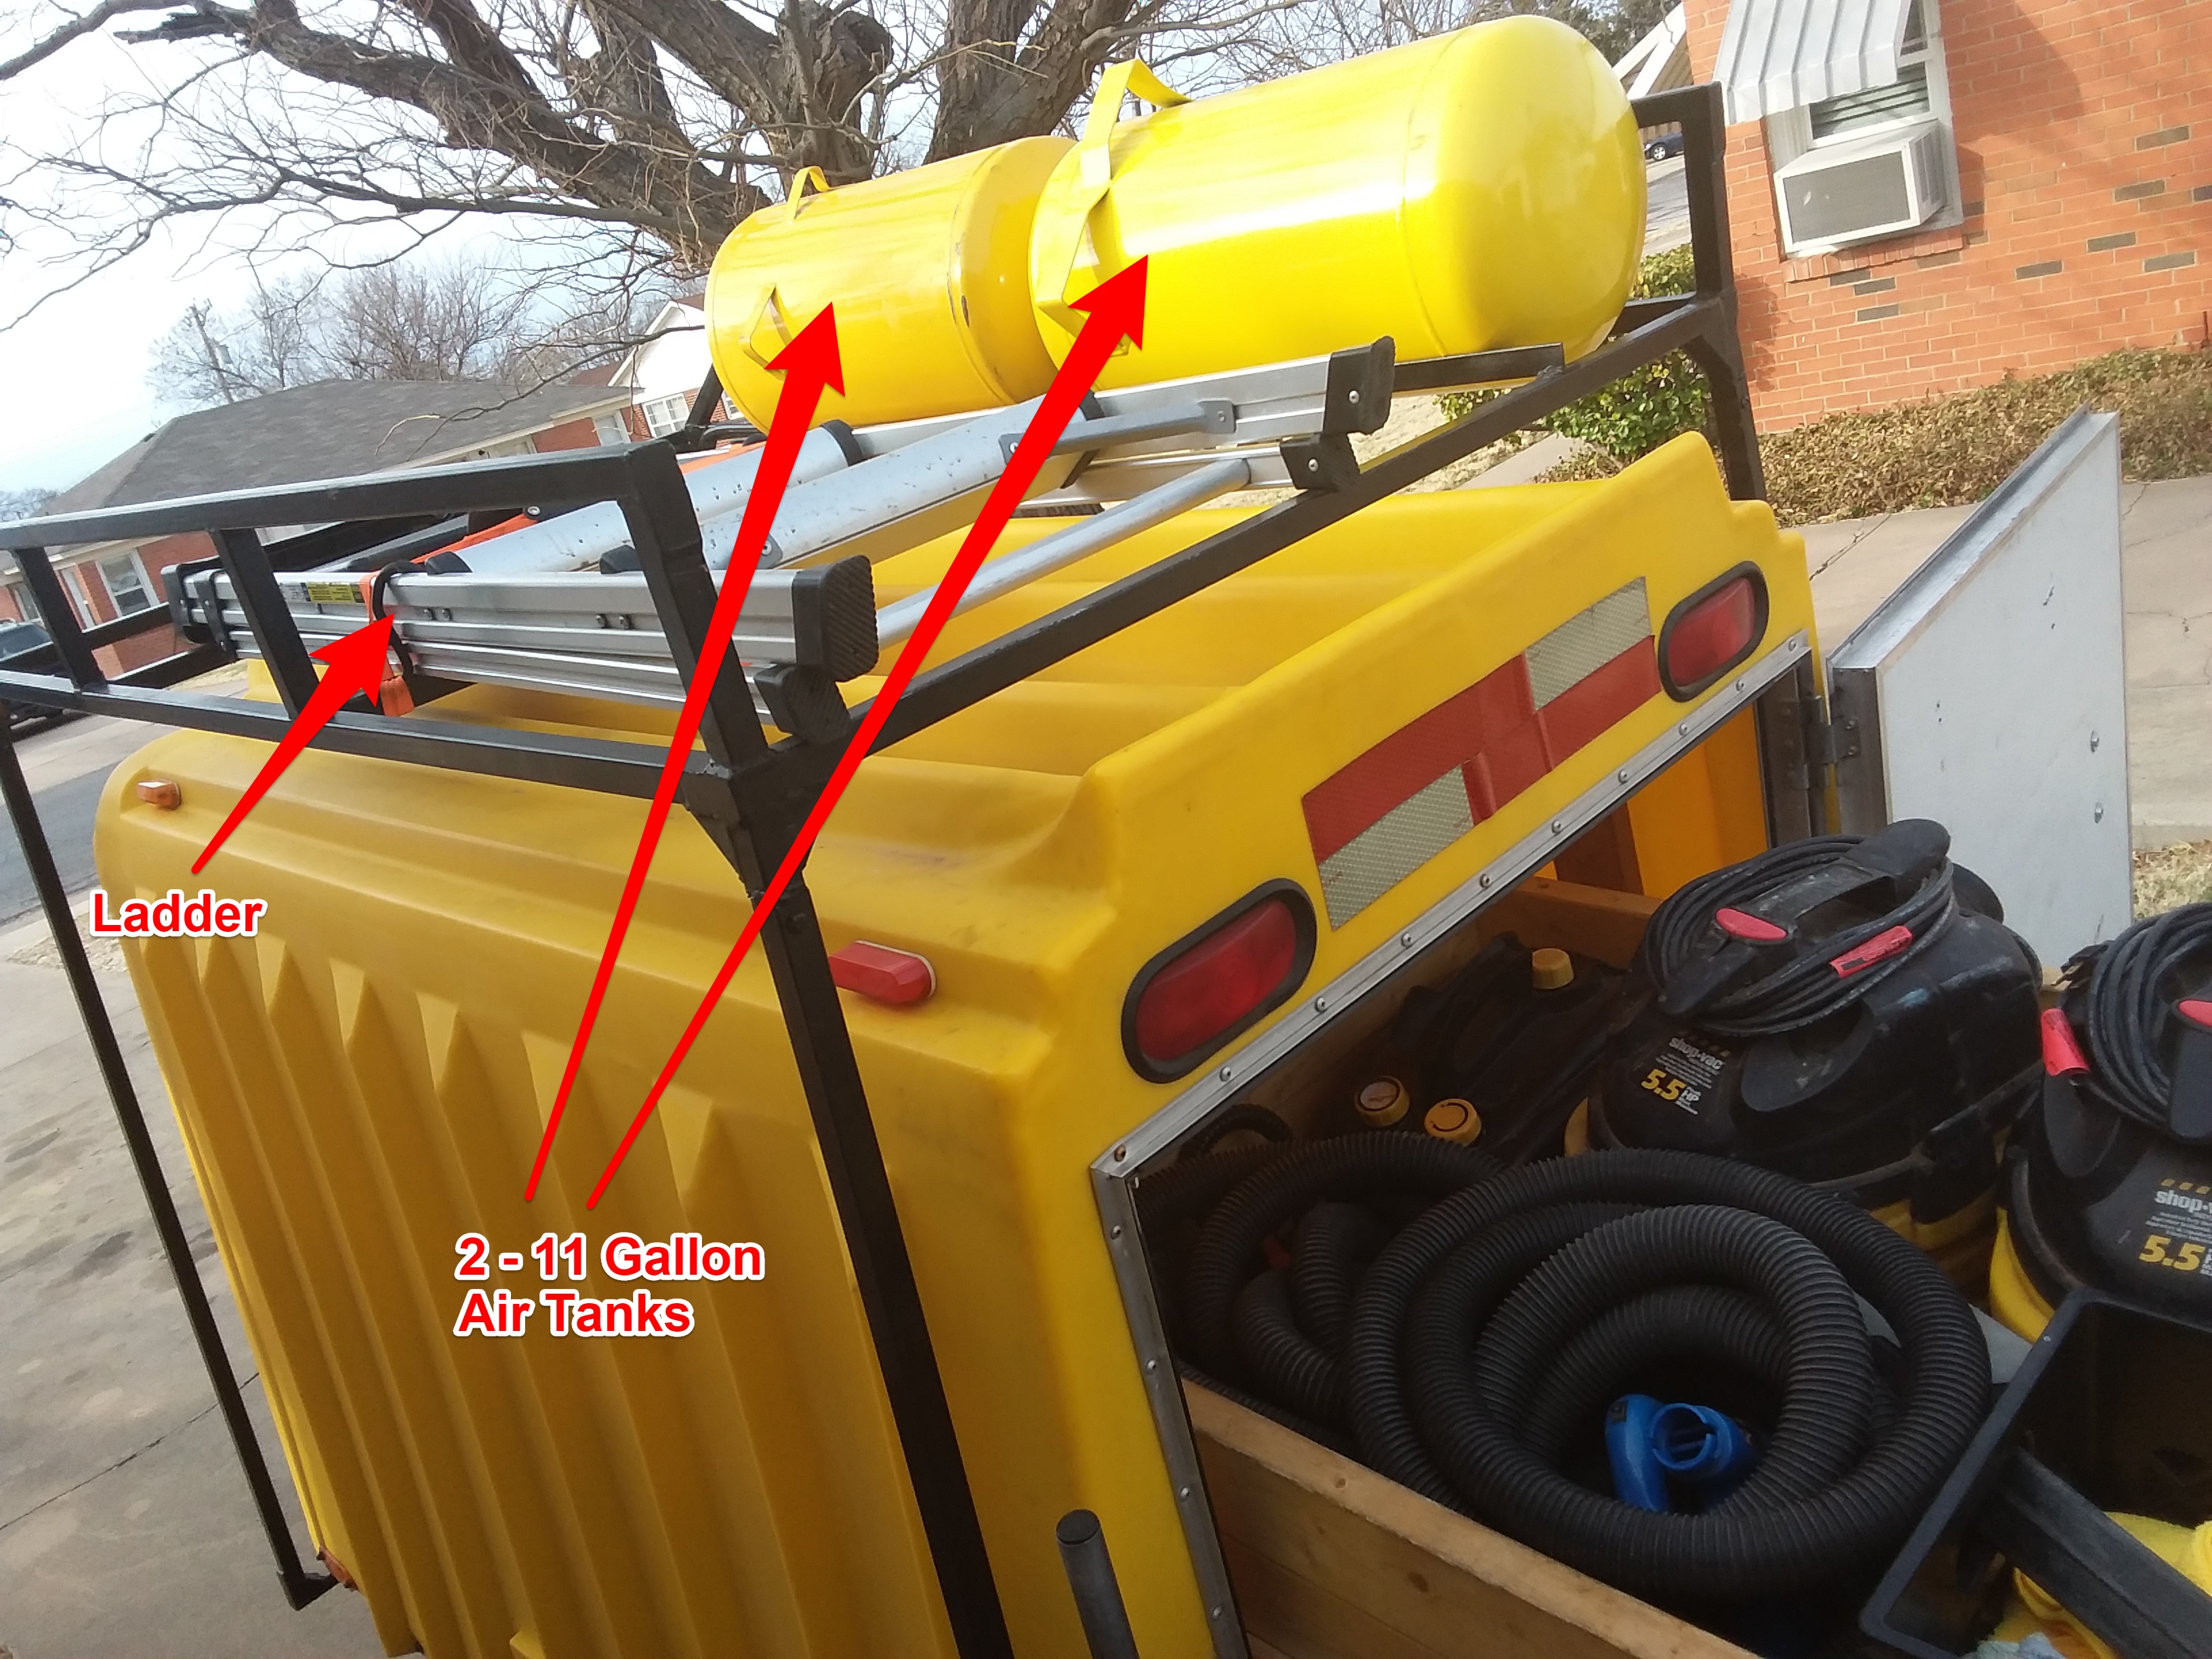
We have added a new rack to our trailer. This will make it easier to carry our ladder and enable us to carry a larger ladder for RV detailing that we will be getting in to hopefully this summer. We also carry extra air tanks for our air compressor giving us more usable air time with our air tools.
 Some of you know how loud our generator is. We this is no more. We have upgraded our generator. Our new generator is quieter, provides more power, lighter and is more fuel efficient. This mean you may not even hear us detailing your car. Plus we can run more equipment at the same time witch means we can clean quicker.